Sign In
 Create Account


This article includes directions for removal and installation of both Shift Improvement Soleniods or Performance Valve Body. It also can be used for transmission filter service and oil change.
The NAG1 (new automatic gearbox 1) 5 speed automatic is the same transmission used by Mercedes (5G-Tronic/722.6) for years in the AMG performance series. Dodge/Chrysler made a few changes that down grade the performance. These changes included shift soleniods and clutch pack media. When in Mercedes trim it has the capacity of 798ft/lbs torque. In Chrysler trim it is rated at 427ft/lbs. When performing mods on your challenger and reach the 500+ rwhp mark. The line pressure is not great enough to hold the clutches properly engaged during shift changes. A simple modification to hold the transmission to around the 600 rwhp mark is to change either the entire valvebody to a performance unit or to simply change the shift soleniods to Mercedes units.
Valve Body Performance Upgrade can be purchased from Paramount Performance Products. Sold also by many Vendors.
Shift Soleniods Part# 240 270 00 89 can be purchased from Vendors or online at
MERCEDES-BENZ VALVE (240-270-00-89)
Tools Needed:
4 Jacks stands
Floor Jack
Small Jack and wood block (hold up rear of transmission)
7mm 1/4 socket
1/4 extension
1/4 ratchet
1. Raise car and place on jack stands.
2. Place small jack and wood block under rear of transmission behind the crossmember.
3. Remove the transmission crossmember to gain access to the transmission pan.
4. Disconnect the wire plug from the drivers side of the transmission.
a. Rotate the bayonet lock of the adapter plug counter-clockwise.
b. Using a 7mm socket, loosen the adapter plug bolt inside the hole. Remove the adapter plug from the transmission housing. There are 2 black O-rings on this adapter. Make sure they are still on when removed. If they are not on the adapter when removed you will have to retrieve them from the valve body when it is removed and place back on the adapter.
5. Place a large (CLEAN) oil pan under Transmission. Remove the pan from the transmission. Start from one end and work slowly around to drain oil into the catch pan. You will need to reuse the oil collected (not recommended) or measure to use the same amount of new oil.
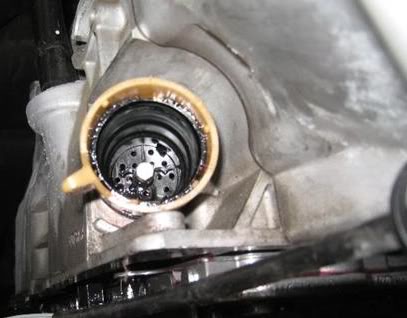
6. Remove the filter by gently pulling down. More fluid will drain. Lay it in oil to reuse.
7. Unscrew 10 Torx socket bolts and remove valve body. Do not let it drop!
If swapping Shift Soleniods skip steps 8-16 (These deal with Peformance Valve Body exchange)
8. Remove the 3 small bolts & retainers that hold the solenoids down. Note one bolt is shorter.
9. Remove solenoids. Make sure to note locations of each.
10. The solenoid at the bottom left (converter solenoid) sometimes needs a bit of wiggling to remove.
Unsnapping the electrical connector plate (dipstick side)
11. On the electrical connector side, push the plastic tab toward the long plastic dip stick guide. The plastic pin will pop right out of the steel plate.
Unsnapping the electrical connector plate (slide piston side):
12. Rotate the temperature sensor SLIGHTLY counterclockwise to release the tab from the steel plate.
If your electrical connector looks like this on the underside of the electrical connector plate, your NAG1 is in BAD shape.
13. Reverse procedure to install the electrical plate.
14. It will simply clip into position.
15. Re-install the solenoids. Reference above photo for locations, actually they can not be installed in the incorrect position, they won't fit.
16. To install Use the same torque (71 in. lbs.) as all the other torx bolts.
Steps 17-19 only deal with Shift Soleniod replacement (Performance Valve Body install skip)
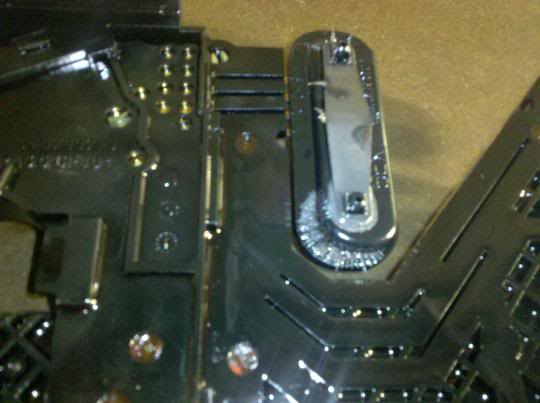
17. Lay Valve body on card board or towel.
18. Remove brown top soleniods only. (pictured above)
19. Replace with blue top soleniods. Torque torx bolt to (71 in/lbs)
Reinstalling Valve Body and Pan
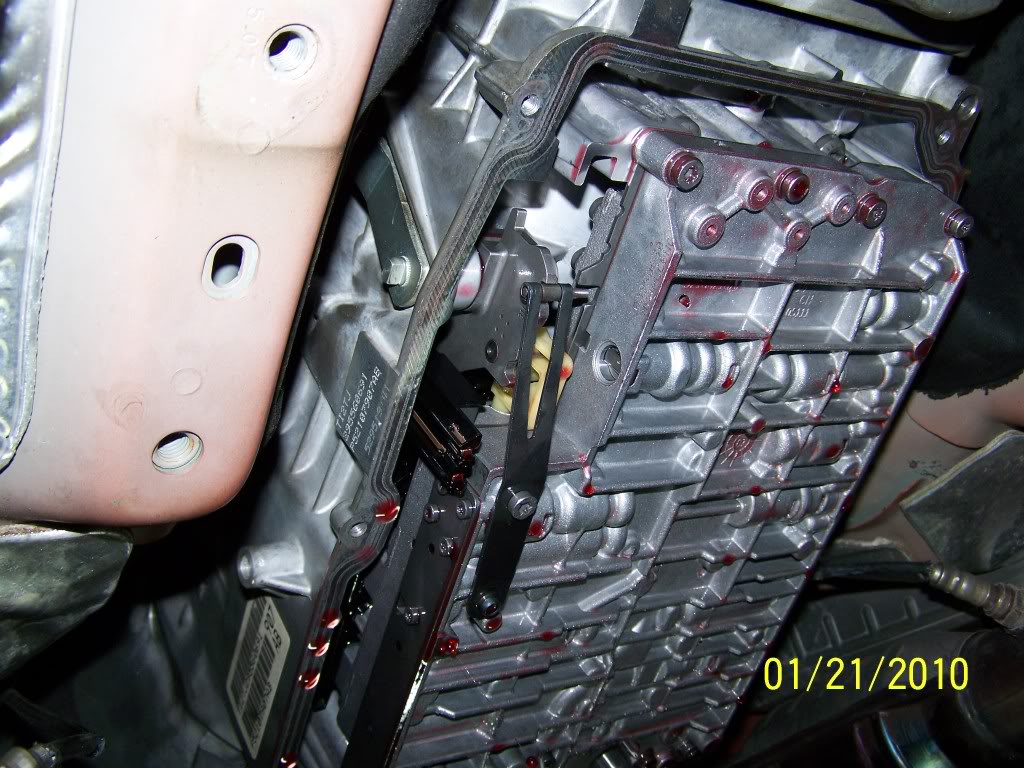
1. Position the valve body in the transmission.
2. Insert selector valve (1) in driver of detent plate (2). This most be completed for transmission to function properly. Double check your work.
3. Reinstall the 10 bolts and torque to 71 IN/LBS NOT FT/LBS!!
4. Reinstall Filter. I would replace if you have over 30k miles or you have higher HP and have noticed transmission slip.
5. Reinstall the Transmission Pan and torque bolts to 71 IN/LBS NOT FT/LBS!!
6. Install the adapter plug back into the transmission housing and tighten the tiny bolt with a 7mm socket. Only snug it, do not torque!
7. Reinstall the plug connector (make sure the 2 O rings are in position)
8. Turn bayonet lock of adapter plug clockwise to connect plug connector
9. Reinstall Transmission crossmember.
10. Remove jack from under transmission and lower car to the ground.
11. Refill Transmission fluid (again not recommended) or use a measuring quart to get exact quantity and fill Trans with appropriate amount of ATF+4 fluid.
If you are uncomfortable with not knowing the exact level in your transmission. To check fluid level you have 3 options.
1. Have a dealer check it.
2. Purchase a NAG1 test dipstick Part# 9336A
https://millerspecia...ail.aspx?id=847
3. Use a long zip tie to bottom out inside the transmission.
on either 2 or 3 after 30 minutes of driving the fluid will be approximately 65mm up on the tool
 Back to top
 View Garage